Expert Guide on Replacing a Bathroom Heat Lamp Cover with Precision
Materials:
- Heat lamp cover replacement (ensure proper sizing for your specific model)
- Screwdriver set (Phillips and flat-head)
- Safety gloves
- Ladder or step stool
- Safety goggles
- Owner's manual for the heat lamp (if available)
DIY Steps:
- Start with Safety Precautions: Before initiating the replacement process, ensure the power to the heat lamp is turned off to prevent any mishaps. Wear safety gloves to protect your hands and safety goggles to shield your eyes.
- Remove the Existing Cover: Using a screwdriver, carefully unscrew the existing cover and set it aside. Make sure to keep track of the screws as you will need them later.
- Measure and Purchase: Take precise measurements of the old cover or consult the owner's manual to determine the correct replacement cover size. Purchase the new cover accordingly.
- Install the New Cover: Position the new cover over the heat lamp fixture aligning it with the screw holes. Secure the cover in place by reattaching the screws using the screwdriver.
- Test for Functionality: Once the new cover is securely in place, turn on the power to the heat lamp to ensure proper functionality. Confirm that the heat lamp operates effectively with the new cover.
Technical Aspects:
- Tools: Proper usage of a screwdriver set is essential for removing and securing the cover.
- Timing: The entire process can typically be completed within 30-45 minutes, depending on your familiarity with the task.
- Critical Techniques: Ensure the cover is aligned correctly with the fixture to prevent any gaps where heat can escape.
- Safety: Always prioritize safety by wearing gloves and goggles, and working on stable footing to avoid accidents.
DIY Project Process:
- Sequential Steps: The installation process requires precision in aligning and securing the cover for optimal function.
- Troubleshooting Tips: If the new cover does not fit correctly, double-check the measurements and compatibility with your specific heat lamp model.
This detailed guide equips you with the necessary knowledge and steps to effectively replace your bathroom heat lamp cover, ensuring a well-maintained and functional fixture for your home.
Introduction
Replacing a bathroom heat lamp cover may seem like a simple task, but its significance goes beyond mere aesthetics. A well-maintained heat lamp cover plays a crucial role in ensuring the safety of your bathroom environment while also contributing to the longevity and efficiency of your heat lamp system. As we delve deeper into this ultimate guide, we will explore the essential aspects of understanding, choosing, removing, and installing a replacement cover, ultimately empowering you to tackle this task effectively.
Importance of a Bathroom Heat Lamp Cover
The role of a heat lamp cover in bathroom safety
The primary function of a heat lamp cover in bathroom safety cannot be understated. By acting as a protective barrier between the heat lamp bulb and the surrounding environment, the cover prevents potential hazards such as accidental contact with the hot surface. This feature is especially crucial in households with children or elderly individuals, where safety is paramount. Opting for a high-quality, durable cover can significantly reduce the risk of burns or electrical accidents, making it a prudent choice for any household looking to enhance bathroom safety.
Preserving the longevity of your heat lamp
Beyond safety considerations, a well-maintained heat lamp cover also plays a vital role in preserving the longevity of your heat lamp system. By shielding the bulb from dust, moisture, and other external factors, the cover helps maintain optimal performance and efficiency. Additionally, regular maintenance of the cover can extend the lifespan of the heat lamp bulb itself, reducing the frequency of replacements and saving you both time and money in the long run. Investing in a high-quality cover that is easily cleanable and resistant to wear and tear is key to ensuring the ongoing functionality of your heat lamp.
Common Issues with Heat Lamp Covers
Cracks and damage
One common issue faced by heat lamp covers is the occurrence of cracks and damage over time. These imperfections not only detract from the aesthetics of your bathroom but also compromise the effectiveness of the cover in providing proper insulation and protection. Choosing a cover made from durable materials such as tempered glass or heat-resistant plastics can mitigate the risk of cracks and ensure long-lasting performance.
Yellowing or discoloration
Another prevalent issue with heat lamp covers is yellowing or discoloration, often caused by prolonged exposure to heat and UV rays. Not only does this affect the visual appeal of the cover, but it can also impact the dispersion of heat from the lamp. Opting for UV-resistant materials when selecting a replacement cover can help prevent yellowing, ensuring that your heat lamp maintains its efficiency and appearance over time.
Choosing a Replacement Cover
Choosing the right replacement cover for your bathroom heat lamp is a critical step in ensuring the safety and longevity of your heat lamp system. When considering a replacement cover, several factors come into play to guarantee optimal performance and durability. The material and sizing of the cover play a significant role in its effectiveness.
Material Considerations
Glass vs. Plastic Covers:
When deciding between glass and plastic covers for your heat lamp, it's essential to weigh the pros and cons of each material. Glass covers offer durability and heat resistance, making them suitable for high-temperature environments like bathrooms. They are also aesthetically pleasing and easy to clean, adding a touch of elegance to your space. However, glass covers can be more fragile and prone to shattering if mishandled. On the other hand, plastic covers are lightweight and less likely to break, providing a safer option in households with children or pets. However, they may not withstand high heat levels as effectively as glass covers.
Heat Resistance Ratings:
Considering the heat resistance ratings of replacement covers is crucial for ensuring their longevity and performance. Opting for covers with high heat resistance ratings guarantees that they can withstand the heat emitted by the lamp without warping or discoloration over time. This feature is especially important for bathroom heat lamps that generate significant heat during operation. Choosing covers with appropriate heat resistance ratings ensures that they remain functional and intact under high temperatures.
Sizing and Compatibility
Measuring Your Existing Cover:
Accurately measuring your existing cover is vital to selecting a replacement that fits securely. Measure the diameter and depth of your current cover to ensure compatibility with the new one. Taking precise measurements prevents misalignments and ensures a snug fit, reducing the risk of accidental dislodgment. Proper sizing also enhances the heat distribution efficiency of the lamp, optimizing its performance.
Ensuring Compatibility with Your Heat Lamp Model:
Ensuring that the replacement cover is compatible with your specific heat lamp model is essential for seamless installation. Different heat lamp variants may require covers of varying sizes or shapes. Checking the manufacturer's specifications or consulting with a professional can help determine the compatibility requirements. Choosing a cover that aligns with your heat lamp model guarantees a proper fit and optimal functionality, preventing potential hazards or malfunctions.
Removing the Old Cover
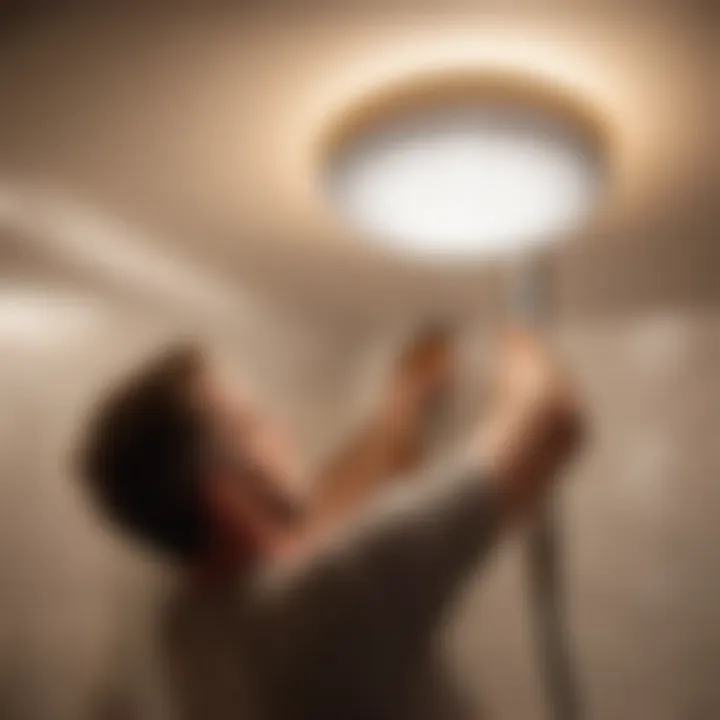
When it comes to the crucial task of removing the old cover of your bathroom heat lamp, it's essential to approach it with caution and precision. This step sets the foundation for a successful replacement and ensures safety throughout the process. By carefully following the outlined steps, you can avoid accidents and damage to your fixture. Proper removal not only facilitates the installation of the new cover but also minimizes risks associated with working around electrical components. This section will guide you through the necessary precautions and the step-by-step removal process.
Safety Precautions
Switching off the power supply
Switching off the power supply is a critical safety measure before removing the old cover. By cutting off the electricity flow to the heat lamp, you eliminate the risk of electric shock and short circuits. Always locate the circuit breaker or fuse box controlling the bathroom's power and turn off the corresponding switch or fuse. This simple yet crucial step ensures your safety and the integrity of the heat lamp circuit. It is a fundamental practice that significantly reduces the chances of accidents during the replacement process.
Allowing the cover to cool down
Allowing the cover to cool down is another vital safety precaution when removing the old cover. Heat lamps generate high temperatures during operation, making the cover hot to the touch. Waiting for the cover to cool ensures you can handle it without risking burns or injury. It's recommended to give ample time for the cover to cool completely before proceeding with removal. This precautionary measure prioritizes your safety and prevents any potential accidents due to handling a hot cover. By exercising patience and allowing the cover to cool naturally, you enhance the overall safety of the replacement process.
Step-by-Step Removal Process
Unscrewing the existing cover
Unscrewing the existing cover involves carefully loosening the screws that secure it in place. Use the appropriate screwdriver to avoid damaging the screws or the surrounding fixture. Ensure a firm grip on the cover while steadily removing each screw in a consistent manner. This methodical approach prevents the cover from falling unexpectedly and maintains control throughout the removal process. By unscrewing the cover with precision, you can smoothly detach it from the heat lamp assembly without causing any disruptions.
Carefully detaching the cover
Carefully detaching the cover requires gentle handling to avoid unintended damage. Once the screws are removed, support the cover from underneath to prevent it from falling. Slowly lift the cover away from the heat lamp, staying alert for any potential resistance or obstructions. Take your time to detach the cover without applying excessive force, as it may be fragile or connected to other components. By handling the cover with care and attentiveness, you ensure a smooth and safe removal process, setting the stage for the installation of the new cover.
Installing the New Cover
Preparing for Installation
Gathering Necessary Tools
When it comes to gathering necessary tools for installing the new cover, precision and quality are paramount. The chosen tools play a vital role in achieving a professional and secure installation. Opting for high-quality tools such as a screwdriver set, measuring tape, and possibly gloves can significantly aid in the smooth assembly of the cover. Their durability and ergonomic design make them ideal choices for this particular task. The unique feature of these tools lies in their ability to provide a comfortable grip and precise maneuvering, making them indispensable for this installation.
Inspecting the New Cover for Damage
Inspecting the new cover for damage is a crucial step before installation. By carefully examining the cover for any cracks, scratches, or defects, you can ensure a flawless end result. The meticulous inspection guarantees that only a pristine cover is installed, maintaining the aesthetics and functionality of your bathroom heat lamp. This attention to detail not only enhances the overall look but also extends the longevity of the cover. Taking the time to inspect ensures that any potential issues are addressed before installation, minimizing the risk of future complications.
Securing the Replacement
Aligning the Cover Correctly
Aligning the cover correctly is a fundamental aspect of securing the replacement cover. Proper alignment ensures that the cover fits snugly and securely in place, preventing any loosening or misplacement over time. The key characteristic of precise alignment is the seamless integration of the cover with the existing fixtures, creating a cohesive look in your bathroom. This alignment not only enhances the visual appeal but also contributes to the overall safety and efficiency of the heat lamp setup.
Tightening Screws Evenly
Tightening the screws evenly is a critical final step in securing the replacement cover. The uniform tightening of screws ensures that the cover is evenly fastened, eliminating any potential gaps or instability. This meticulous approach to tightening guarantees a strong and durable attachment, reducing the risk of accidents or malfunctions. The unique feature of this technique lies in its ability to distribute pressure evenly, maintaining the integrity of the cover and its fixation. By following this step diligently, you can enjoy a perfectly installed cover that enhances both the aesthetics and functionality of your bathroom heat lamp.
Final Checks and Tips
Completion of the replacement process for a bathroom heat lamp cover does not end with affixing the new cover. Instead, it transitions to the critical stage of final checks and tips. These final measures play a crucial role in ensuring the effectiveness and longevity of the newly installed cover, providing a comprehensive evaluation of the entire replacement process.
In this section of the article, we emphasize the significance of conducting thorough final checks and provide valuable tips for maintaining the cover's optimal performance over time. By covering aspects such as testing the new cover and implementing proper maintenance routines, this section aims to elevate the reader's understanding of long-term cover care.
Testing the New Cover
Turning on the Heat Lamp
When it comes to testing the new cover, a fundamental step involves switching on the heat lamp. This action not only validates the functionality of the installed cover but also ensures that it adequately performs its intended role of diffusing heat evenly and effectively across the bathroom space. By observing how the heat distributes and monitoring any potential inconsistencies, homeowners can verify the successful installation of the cover.
Furthermore, conducting this test allows for the identification of any immediate issues or malfunctions that may have arisen during the replacement process. Through the simple act of turning on the heat lamp, homeowners can promptly address any irregularities, guaranteeing a safe and efficient heating experience.
Checking for Any Gaps or Issues
Apart from testing the heat lamp functionality, a crucial part of the final checks involves a thorough inspection for gaps or issues. Even a minor gap in the cover can compromise its insulation properties, leading to heat loss and inefficiency in heating the bathroom. By meticulously examining the edges and surface of the cover, homeowners can pinpoint any gaps or potential areas of concern.
This meticulous inspection not only ensures the cover's seamless integration but also contributes to the overall safety of the heating system. Identifying and addressing any gaps promptly can prevent energy wastage and enhance the cover's ability to regulate heat effectively, promoting a comfortable and well-heated bathroom environment.
Maintenance and Care
Cleaning the Cover Regularly
The task of cleaning the cover regularly emerges as an essential component of its maintenance regimen. Regular cleaning helps preserve the cover's aesthetic appeal and transparency, allowing the maximum diffusion of light and heat. By selecting appropriate cleaning solutions and techniques, homeowners can maintain the cover's clarity and ensure optimum performance.
By incorporating this maintenance step into their routine, homeowners can prevent the accumulation of dust or debris on the cover, which can obstruct light transmission and diminish its efficiency over time. Implementing a consistent cleaning schedule contributes to the cover's longevity and ensures a consistently clear and bright bathroom illumination.
Inspecting for Wear and Tear
Conducting routine inspections for wear and tear stands as a proactive approach to cover maintenance, enabling homeowners to address potential issues early on. By closely examining the cover for any signs of damage, such as cracks or discoloration, individuals can intervene before these issues escalate and impact the cover's functionality.
Regular inspections allow homeowners to assess the cover's condition and preemptively replace it if necessary, avoiding prolonged exposure to compromised covers that may pose safety hazards. By integrating this practice into their maintenance routine, homeowners can uphold the cover's structural integrity and ensure continued functionality for a well-lit and warm bathroom space.